Moodle gradebook
Caution: Moodle's default settings drop all "empty grades" (look like "-" in the gradebook) from a student's grade. So if out of 10 assignments, a student gets 100 on one assignment and no grade (=empty grade) on everything else, their average is 100. One way around this is to make sure you enter an actual 0 for each grade. We will also address this issue with settings below. You can also see this page: https://maultsby.wordpress.ncsu.edu/resources/moodle-gradebook/how-to-ensure-that-empty-grades-are-0/
Step 1: Set up categories with weights.
I recommend having a category for everything, including
- a "Final Exam" category (even if it only contains one item), and
- a "Miscellaneous" category for everything that doesn't go into the grade computations (you will set its weight to 0).
The reason is that it is notoriously difficult to make Moodle compute grades correctly if you are balancing categories with individual items. If you establish master categories from the beginning and put each item in a category, then adding and subtracting individual assignments later should not mess up your grade computations.
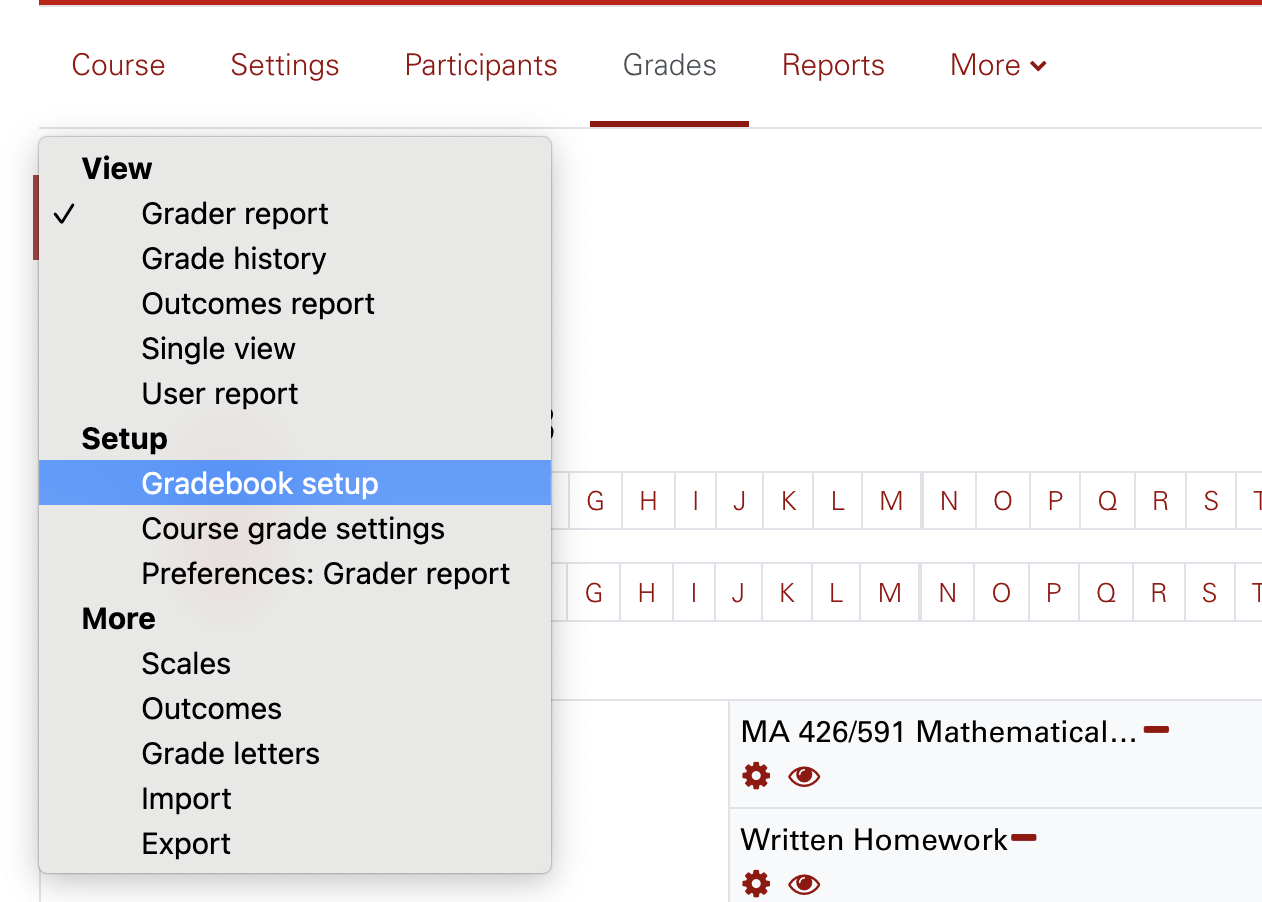
- At the top of Moodle, on the horizontal bar, click Grades.

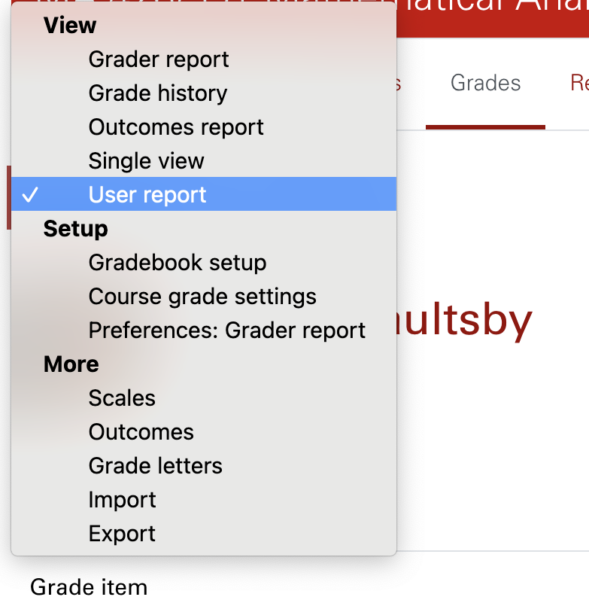
- Click the dropdown menu near the top-left, then Gradebook setup.
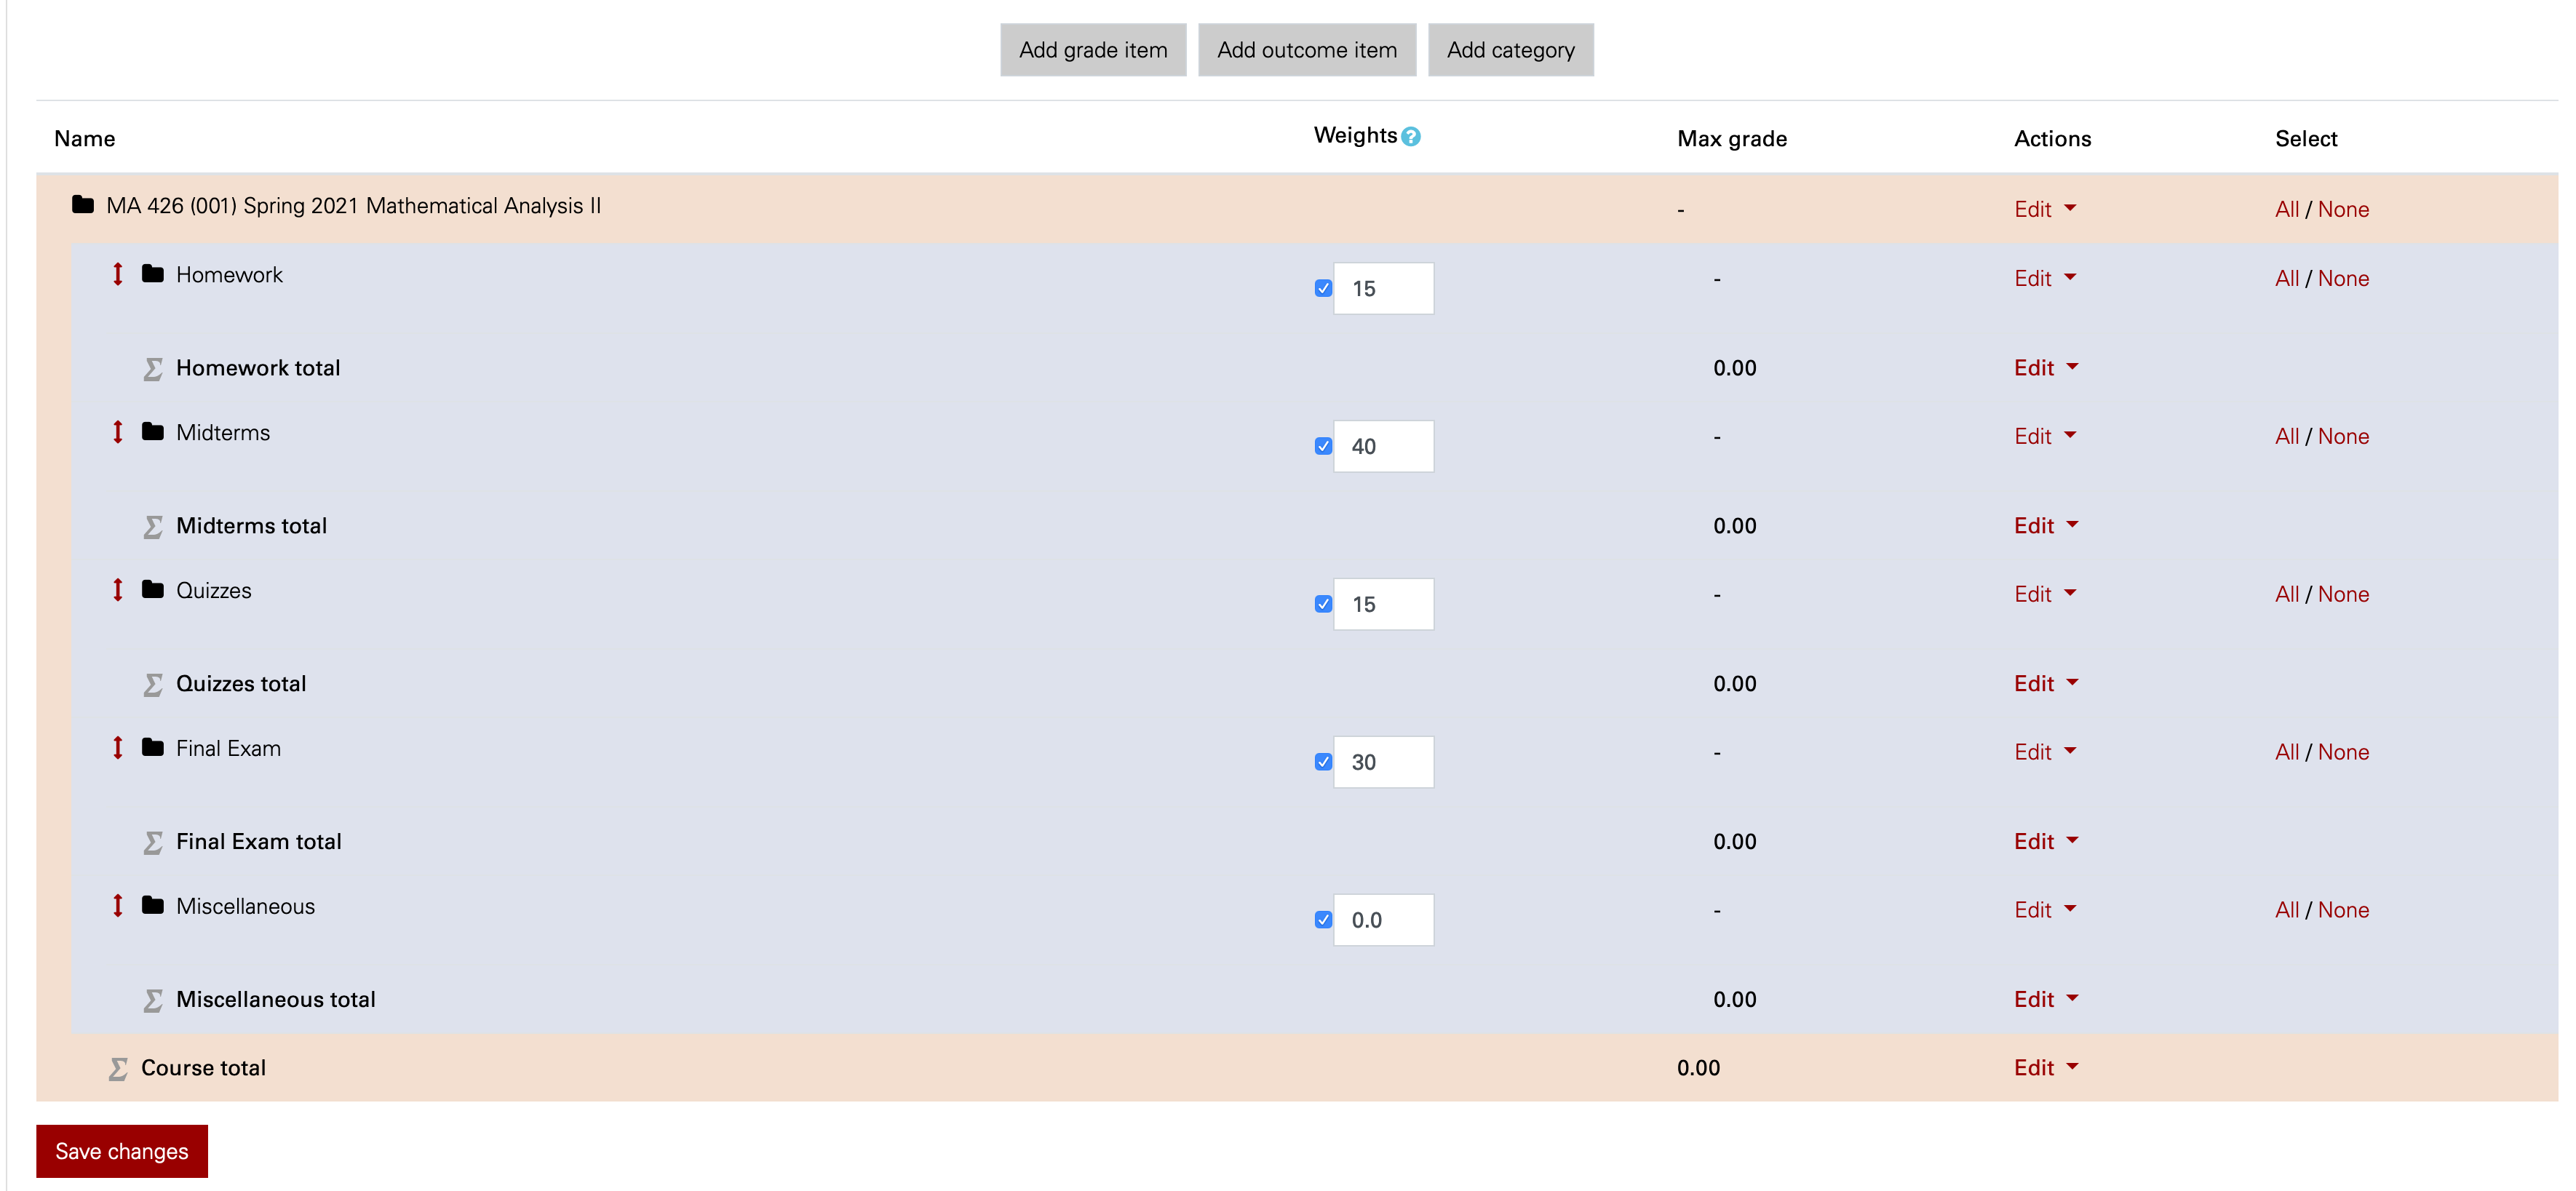
- Click the button Add category.

- Name your category. I usually don't change anything else and click Save changes. [However, at this stage you may want to click on the first Show more... to do things like tell Moodle that empty grades are 0's (uncheck the Exclude empty grades box) or to drop the lowest two scores from a student's category average, etc.]

- Repeat for each category.
- Once all categories are made, including the Final Exam category and the Miscellaneous category, check the boxes and distribute the weights out of 100.
Step 2:Now place grade items in the correct category:
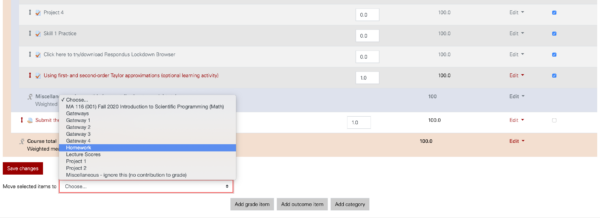
- If you already have a lot of assignments in your gradebook, check all that belong to the same category, scroll down to the bottom, and move them in bulk.
- You can always click the ↕ arrow to the left of any item to move it around.
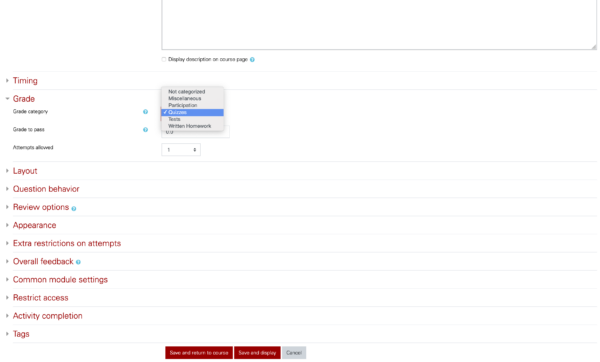
- When creating a new assignment, under the Grade category you can put it in the right place.
Step 3: Set up the grade settings.
These can be changed at any point. Below are my general changes, but these are optional!
Under the Dropdown Menu (see Step 1, #2 above) --> Course Grade Settings, leave all as default except...
- Overall decimal places --> 1
- Hide totals if they contain hidden items --> Show totals including hidden items (there are two instances of this). (This is really up to you... click on the ? symbol to read about this. If you put anything that doesn't go into their grade in the 0 weight Miscellaneous category, then this setting shouldn't matter.)
- Show letter grades --> Show.
- You can adjust the letter grades to match your syllabus under Letters --> Edit letter grades.
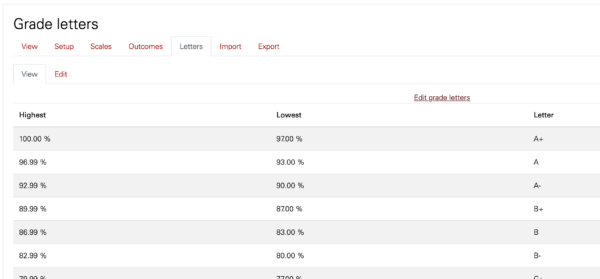
Step 4: Choose how you report grades to students.
★ Recommended settings for a progress report. Recommended up until the last two weeks of class. These settings make it so that students see their scores weighted based on what has already been collected. They are not penalized for future assignments.
- For each category, check the box that says Exclude empty grades. This means future assignments that the students haven't done yet are not included in their averages.
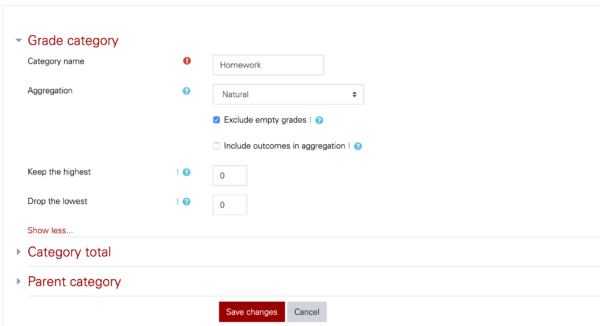
- Under Course Grade Settings mentioned above, also do...
- Show weightings --> Hide (I think it's confusing otherwise, as things may seem to contribute more than the syllabus suggests)
- Show contribution to course total --> Hide (same reasoning as above)
★ Recommended settings for their final grade computation. Recommended for the last two weeks of class until the end. (These settings make it so that students see their scores weighted based on everything. Set this up too early and everyone will have an F.)
- For each category, uncheck the box that says Exclude empty grades. This means future assignments that the students haven't done yet are included in their averages. Consequently, if they are missing work or have a few assignments left to collect, they can see that their grades isn't yet an A (or an S!). If you do not uncheck this box, students who turn nothing in will see an artificially high grade.
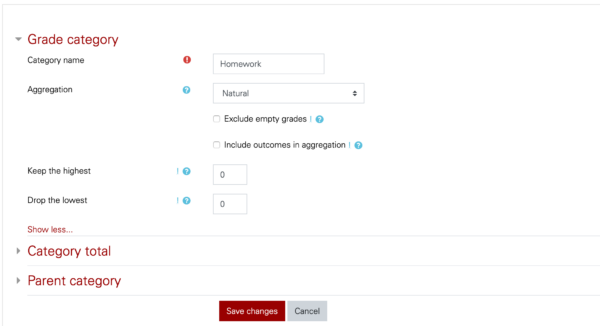
- Reset any changes to the Course Grade Settings that you may have done for the progress report to the default settings or to the suggested settings in Step 2.
Other tidbits:
- You can import/export grades to a csv. Typically I export to a csv, then open in Excel and compute the final grades there.
- To see what your students see, click the dropdown menu --> User Report --> Select the student in question --> View report as user.
- If you get your gradebook settings right, and then activate next semester's Moodle with your current template, everything copies over!

